Wednesday 30 April 2014

S B grand ovals


Morning all well the days here I get my new car at 10am cant wait. Ive already named her betty.

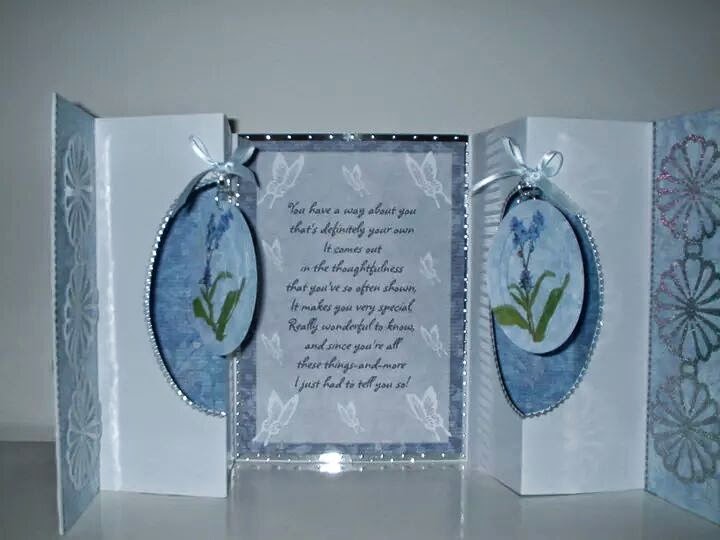
for todays card I used the spellbinders grand ovals.
I started with a 8"-8" white card. I then matted a piece of pretty paper on it.
I then cut the ovals out in pinks and white card
I mounted the in the centre of my card.
I then stamped my sentiment and sorry I cant remember the name of the die I used.
I then tied a large bow and glued it to the side of my card.
I then cut a large butterfly and glued it to the right corner.
To finish with I added some gem swirls.
Thats all for today and I hope to see you tomorrow. Debs xx

Monday 28 April 2014

Jade Butterflies


Good morning its Monday and Ive got 2more days to go before I get my new car. I'm on count down now. Anyway back to today's card.
I started with a fancy card.
I then cut the Resplendent rectangles in white and Jade.
I layered them all up and added them to the centre of my card.
I then die cut and embossed two strips of jade card to go down both sides of my card.
I then added ribbon on to both sides.
Then for my centre piece I cut the butterflies from Tonic Studio dies.
I then glued them into the centre of the card
To finish with I added a white bow
and two hatpins.
That's all for today. Xx

Debs see you back here tomorrow xx

Sunday 27 April 2014

sheila's Birthday card


Morning all on this Sunday hope you are all well.
well here the weather  doesn't know what to do I hope its better then yesterday as we had rain thunder sun shine.

For today's card I started with a 8"-8"white card on which I cut a mat that I embossed.
I then cut a smaller mat and cut the Marianne CR1242 Out at the top right hand side corner.
I then put some pretty pink paper behind it.
I then cut the S.B scalloped border and added it to the left hand side.
I cut the sizzix Dahlia die and I then made a lovely flower. I then added it to the left side on to the border.
I then cut 2 Daisy's out with my cricut and added them to the top and bottom of my border.
I cut a labels one out and stamped my sentiment on it.
I added it to the centre of my Aperture.
To finish with I tied a bow and glued it just under the aperture.
That's all for today
Debs xx


Friday 25 April 2014

blue iris


Morning all hope you are all well. Well my new car as been put back to Wednesday next week so I'm not very happy.
Today's post is a quick one as I've got a stinking  bad cold and all I want to do is sleep.

I made a 8-8 inc card and matted lilac and white card. I then embossed the top mat and wrapped a lilac ribbon around the centre.
my image is from Hunky dory.
That's all for today and i hope I feel better for tomorrows post. See you then Debs xxx

Thursday 24 April 2014

Tall Book of tricks


Good morning all 4 days and counting till I get my new car.

Today's card I made for my friends birthday she us a pink girly girl so I thought is would be up her street all pinks and silvers.

To start with I used the glitter girls tall book a tricks embossing board.
I embossed and cut out all the pages in pink and silver.
I then used my glue gun to glue them all together on top of each other.
I printed a lovely verse on white card and cut it out and added it the top page on the right side.
Before I glued my pages to my back card I wrapped a piece of ribbon down the centre of my pages and added a large bow to the top.

Next I glued a white feather on to the left side using my glue gun.
I then made a spray of flowers and glued them on top of the feather. I then tied a small bow out of pink ribbon and added it to the bottom of
my flowers.
That's all for today Debs xxx

Wednesday 23 April 2014

pop out iris


Good morning all its now Wednesday and it and only 5days till I get my new car can't wait.

Today's card is the size of A4.
To start with I made two A5 pop out cards that I cut Apertures on which joined at the back to make my large card.

I cut out two toppers from MCS Cd I put them on to jump rings a added them into the apertures.

In the centre of my card where I joined the two cards I printed a verse and added it to the inside of my card.

I the decorated the inside  with pretty papers.

To finish with I printed two toppers and a sentiment out using the same cd. I added some pretty papers to both the fronts.
I put the sentiment and a topper on to the left hand side and a topper onto the right side.

I do hope you like this one as it does look better in real life. Debs xx

Thank you for looking xx

Tuesday 22 April 2014

book of parchment


Morning all hope you all are well. Well its soon got around to Tuesday I cant believe where this years is going.

Today's card I used the my craft studio parchment CD.

I printed the book out on to parchment.
I also printed a sentiment and a small verse..

Next I embossed over all the print. After embossing all my printed lines I used a grid to emboss a frame around my page.

I then wrapped a piece of ribbon down the centre. And I then tied a bow and added it to my ribbon at the top.

Next I took a A5 card landscape. I the glued my parchment page to my card. The ribbon covered the glue up.

To finish with I made two flowers out of parchment and then I sprayed them with crafters companion stay and spray so I could drip my flowers in to glitter.

I then glued them to my page. Again the glitter covers the glue.

That's all for today.
Debs xx

Thank you for taking time to visit me
I really like to hear your comments. Debs xx

Monday 21 April 2014

Christmas blessing


Good morning now I know you will all think Ive lost the plot as its only Easter Monday and I'm making Christmas cards.
But I have had lots of orders so I thought Id make a start.

This is a really simple card.

I started with a A5 card. Which I embossed down the side by using one of the glitter girls boards.

I then die cut a scalloped oval and on to that I added my Christmas roses.

To finish with I added my sentiment to the top corner. And I added a gem into all the scollop's on my topper.

That's all for today see you back here tomorrow. Debs xx

Sunday 20 April 2014

Thank You


Good morning all and a Happy Easter to you all.

Today's card is made with a 8-8inc white card blank.
I cut a mat out of some lovely peach paper that I had In my stash.

I then wrapped a piece of white ribbon around the centre of it and then I added it to my card.

For my centre piece I cut SB Labels one out of white and peach card. on the smallest one I added my sentiment on to it.

I then cut two fancy corner in white and glued them to opposite corners.

To finish with I added flowers to the two opposite corners.

I then cut some flourishes and added them to the flowered corners.

That's all for today and Happy Easter. Debs xx

Saturday 19 April 2014

Baby boys forever friends


Good morning all hope you all are ready for Easter.

Today's card I made for a new baby boy as a keepsake.

It my look very difficult but it was quiet easy.

All I did was make 6 pop out card and glued them all together. I printed some forever friend bears from a cd. I added them on to invisible thread and fastened them on to the apertures.

I the added ribbon around the card to tie the card. To finish with I decorated the front.

That's all for today  and I hope you all have a lovely Easter. Debs xx

Friday 18 April 2014

Heartfelt swirl


Good morning all well the sun is shining here this morning for how long I don't know.

Today's card turned out really well
I started off with a A5 deep red card on which I added a white mat that I embossed.

 I think the die that I used next is called heartfelt swirl. I cut it once and then i turned it round to cut it again to make a doily. I added it to a deep red mat that I cut for it to sit on.

I glued it to the centre of my card. I printed my sentiment and cut it out with a tag die.

Next I tied a messy bow out of deep red ribbon and added it to the side of my card.
I added some pearls and a embellishment on top of the bow.

I then added some lovely flowers  that I got from wild orchard website.

I finished off with some gem swirls.

That's all for today and I hope you all have a happy good Friday.  Debs xx

Thank you for dropping by xx

Thursday 17 April 2014

vintage girl


Good morning friends, followers and bloggers.
This is my last get well card for a while I hope.

To make this card I started with a 8-8 inc white card. I covered it with some vintage paper from my stash. I printed my topper off that I fould on the internet. I cut the largest die in the sp rediant rectangles out in pink and the I cut my topper out with the next size down.I then glued it to the top of my frame. I added a piece of pink ribbon around my card. I added my topper to the side of the card. I tied a large bow and glued it on to my ribbon at the side of my topper.
Next I stamped my sentiment and cut it out with a smaller die from the set. I then inked around the edges. I then added it to the top of my card.

Thats all for today see you all tomorrow.
Debs xx

Wednesday 16 April 2014

A butterfly get well


Good morning all hope you are all well. On this lovely wednesday morning. The sun is shining for a change but saying that we had a lovely sunny day yesterday in fact my face is as red as a turkey with sitting in the garden.
Today's card is another get well one. I have used the Tonic regal punch and die set for this one. And the Tonic butterfly dies.
I also used seam binding for my bow. I like to use seam binding as it ties real good.
I was really happy with the way this turned out.

Thats all for today hope you all have a lovely day. Debs xx

Thank you for taking the time to visit xx

Tuesday 15 April 2014

Dressmaker


Morning all hope you are all feeling better yhen I do. I,ve had a bad head for 2 days now.
For today's card i took  a 8-8inc white card.

I embossed the Antique Dressmaker embossing folder. I then just inked around the edge and across the embossing.
I then cut a mat for the topper to sit on.
I added it to the side of my card.
I stamped my sentiment and added it yo the top corner.

I then cut and rolled some flowers and inked all the edges.
I added a pink messy bow to finish off.
see you all tomorrow. Debs xx

Monday 14 April 2014

debs cards: swirly flowers

debs cards: swirly flowers: Good morning all well its soon got back around to Monday. Today's card is a really quick one. All I did was cut a mat to fit on s 8-...

swirly flowers


Good morning all well its soon got back around to Monday.
Today's card is a really quick one. All I did was cut a mat to fit on s 8-8inc card on which I embossed it.
I wrapped a piece of white ribbon around the bottom of my mat.
I added this to my card.
I cut a strip of pink paper and stamped my sentiment on it. I glued this to the side of my card.
I cut and rolled three flowers and added them to the bottom corner.
I tied a messy bow and glued it just under my flowers.
To finish with I added a gem swirl and s butterfly.
It would be nice to here your comments. That's all for today Debs xx

Thank you for looking Debs xx

Sunday 13 April 2014

Happy 50th Birthday


Good morning im having a lazy sunday today so this card was a really quick one to make
Its about  8-9inc card.
I cut a mat and embossed the background I added liquid pearls all over the background.
I printed a sentiment out and i cut it with a ovaldie but sorry I cant remmeber what its called.
I wrapped some deep pink ribbon around the bottom of my  mat.I tied a messy bow out of seam binding and added it to the bottom vorner I added two hatpin to yhe bow.
 I cut five carnation flowers out and glued them across my card. I hope you all have a restfull sunday. Thats all for now Debs xx

Saturday 12 April 2014

Viva Las Vegas


Good morning all friend follower.
Hope you are all well this Saturday morning.
Today's card is for a couple who's getting married in Vegas.

So I have made a traditional card on the outside but funny on the inside. I made a funny verse and a picture.

I cut a 8-8inc white card and I cut a white mat which I embossed it with a xcut art deco design folder.

I then cut the three smallest of the grand decorative circles die set. I printed my sentiment out and cut it the the largest in the stately circles die set.

I cut the bride and groom from tattered lace out of silver Morri card..

To finish with I tied a messy bow out of white organza ribbon and white babies breath flowers.

I think you will have a laugh when you read the verse.
That's all for today Debs xx

Friday 11 April 2014

debs cards: my money tree I wish

debs cards: my money tree I wish: A quick and funny card for this Friday morning a change from yesterday. so its a bit of fun. I found this topper in a local craft s...

my money tree I wish


A quick and funny card for this Friday morning a change from yesterday.
so its a bit of fun.
I found this topper in a local craft shop it was just a tree. And i thought it would make a great card for my son. As like all kids its mum can I have. So when he  was much younger I used to say go and see if the tree at the bottom of the garden as got any money on and if it had you can have.
The topper is the same size as a A5 card so I covered the card and I scanned some monopoly money into Mcs Software and shrunk them down. I cut them out and glued them all over the tree. I was really pleased with the way it came out. I have had loads of orders for it. Its a really funny card for any teenager. That's all for now Debs xx

Thank you for looking Debs xx


Thursday 10 April 2014

Hazel blog

Hi Hazel ehat is your blog address Debs x

debs cards: boxed easter bunny

debs cards: boxed easter bunny: Good morning all fellow bloggers and followers. well today's card could be abit tricky to understand how this card was made but I...

boxed easter bunny


Good morning all fellow bloggers and followers.
well today's card could be abit tricky to understand how this card was made but I will do my best. So here goes.

To start with I printed my bunny from a MCS cd  I cut it out and then added it to my background that I printed out.
The card is made up of three boxes the Base one and two half size of that one.

I made a box and I glued my bunny in it. And then I made a lid for it and i added acetate into the lid i glued the lid on.
Next I made two more boxes half the size of the first one. I printed some more backing papers and embellishment to which I glued into each box I made lid just the same Way of the first one. To join the boxes together i cut two strips of card I put the two side ones on top of the centre one face down. I glued them together with the strips of card.
I printed a matching background And cut it to the size of my box. I added the little girls name across the front. I then cut it up the centre so I could glue one on the underside of the box sides. So when you close the box the name is on the front. To finish with I added a white ribbon to try it closed. I do hope that you can understand My rundown.

Thank you for taking time to visit my blog Debs xxx


Wednesday 9 April 2014

Feeling a little blue get well soon


Afternoon all sorry late with this post been sat in hospital most of the day my dad and what a waste of time. Anyway back to todays card.
I started with a a5 white card and I cut A pale blue mat and on them I cut the radient rectangles outs of blue and white card and then layered them up.
I then cut two flourishes in white to act as leafs.
I tried a  blue messy bow out of seam binding and added it to the side of my card.
To finish with I glued a blue rose on to the top of my bow and added a few gems in the corners. I was really pleased how this one turned out.

Thank you for taking time out to visit me Debs xx

Tuesday 8 April 2014

debs cards: San Francisco

debs cards: San Francisco: Morning all hope you all are well. Todays card is made with Sue wilsons die set. I started with a 8-8 cream card on which I cut ...

San Francisco


Morning all hope you all are well.
Todays card is made with Sue wilsons die set.

I started with a 8-8 cream card on which I cut a navy blue mat.
then I cut a cream one on which I embossed it.
I wrapped a piece of navy seam binding around the side of my mat.
I the cut my die set out of navy and cream I ghen layed them up.
I thrn glued them to the centre of my card. I cut my sentiment out and added it to the top corner.
I then tied a large bow in navy and added it to the bottom of my card on which I glued a cream rose to my bow.
To finish with I added a few gems to the top left corner. It would be nice to hear your comments it lets me know im not here on my own.

Thank you for taking time to visit. Debs xx

Monday 7 April 2014

In the pink


Morning all hope you are all well this monday morning. Dose'nt Time fly when your having fun. It soon gets around to monday.

Todays card is abit bright for me but I must say its turned out well.
I started with a large square black card which I cut a mat out of bright pink card and then a mat in black on which I embossed it.
I then cut a strip of pink card which I punched with  a Tonic punch. I added it to the side of my card.
I then cut some flowers with the jewel flower die set. And I cut some flourishes wth the same die set in white to act as leafs.
i glurd them all on to my card just onto the border.
I tied a large pink bow out of satin ribbon. I made two hatpin to sdd to my bow.
Hope you like this one. I'll be back yomorrow with another card. Debs xx

Thank you for looking. Debs xx

Sunday 6 April 2014

in loving memorie of you mum


Good Sunday morning friend followers and all.
Hope you are all well. Todays really damp and dill here.
Todays card is in memory of my mum who ee lost last year and I miss her so much.
I started with s A5 card on which I Matted my Radient Rectangles in white and creams then cut my sentiment out my using one of the oval dies out of this set in stead of lining it up with the rest i laid it across the card. To finish with i added some flowers and a bow.

Thank you for looking 
Debs xx

Saturday 5 April 2014

Timeless Rectangles


Good morning well its saturday again cant believe how time is flying were now in april.

Todays card I started with a 8-8inc card.
I cut a mat in dusky pink satin board I got from create and craft its there own brand I love it.I embossed it and then I cut a smaller mat in white which I embossed and inked around all edges.
I cut all sizes in the Timeless rectangles in pink a white I inked around the ehite one.
I added my Happy Birthday to the top of these.
I cut some butterflies with the tonic studio dies and added them to the corners.
I cut the lilly out with the tonic lilly die set. I glued it to the bottom corner.
To finish with I tied a messy bow out of pink ribbon and I glued it to the top left corner.
I added two hat pins to my bow. DEBS XX

Thank you for stopping by it would
be nicr yo hear your comments Debs xx

Friday 4 April 2014

Sweet Lilac Paper Flowers: SIGN UP TO EMAIL OFFER LIST

Sweet Lilac Paper Flowers: SIGN UP TO EMAIL OFFER LIST: Sign up here to join SweetLilac' mailshot list. Receive regular updates, special offers and free gifts direct to your inbox! ...
Good morning all you may think I have lost the plot but I have just got a order for 50 christmas cards. I know its only april so you will see some christmas cards popping up here. So dont worry you're not seeing things LOL.
see you later.
 Debs xx

mint butterflies

Good morning all friends and my crafty bloggerswell for this friday morning I have a mint green butterflies.
To start with I took a 8-8inc white card which i cut and added a mat in mint card.
I then cut a white mat and I punched along the top and bottom edges with the Tonic Studio Butterfly punch I glued it to the front of my card.
I cut a piece of mint crushed silk ribbon and wrapped it around the middle of my card.
For my centre piece I cut the Tonic butterfly die in mint green card.
I glued it to the centre of my card. And I added my sentiment on the top of this.
I cut several butterflies from tonic dies and I glued them at random  places.
To finish with I added a large bow I tied with crushed silk ribbon. Debs xx

Thank you for looking Debs x

Thursday 3 April 2014

A touch of gingham


Good morning all, hope you sre all well this thursday morning.
Todays card I started with a A5 white card. I cut a mat just smaller snd I slso embossed it.

I then cut a  mat using 5-7in matting dies and I also embossed it.

I cut the Timeless rectangles die the largest one in blue and the next size down in white of which I glued on top of the blue one.

Next I cut the decorative labels 21. The 2nd and 3rd dies down in blue and white. I glued these just of centre of my card.

I added my sentiment to the top of these.
I cut a few flourishes to act as leafs for my flowers to sit on.
To finish with I added gems and a bow.

Inside the card I matted my sentiment on to the largest Timeless rectangles die set. Check back in  tomorrow. Debs xx

Thank me for looking Debs xx